Agile – Last Man Standing
- Posted in:
- software development
We (teamaton) are beginning to develop a new web application, a ToDo-Management-Tool. It is our goal to be better at everything revolving around the process of developing this new application. Everyone at our company is diving into reading about and testing new tools and processes.
I took on the part of reading about different approaches to developing software, finding out about the pros and cons, figuring out which one probably suits best our needs, and gives us great power to develop the application effectively. I found the Wikipedia article on software development methodology, and went on from there to the different approaches.
Different Approaches
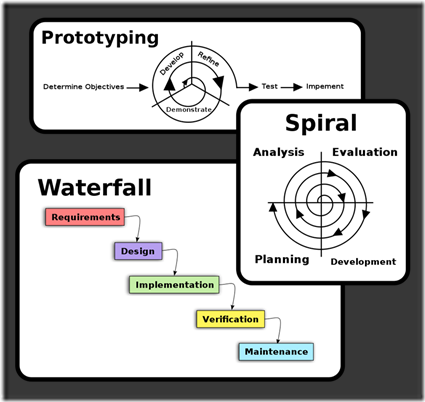
One approach is the Waterfall model, which is a sequential development approach with the following stages: requirement specification, design, implementation, integration, testing and debugging, installation, maintenance. This model assumes that all requirements are specified at the beginning. This is seldom the case.
There are many approaches which try to overcome the deficiencies of the Waterfall model. Seemingly all of them fall under the category of Software prototyping. Its main features are risk reduction, ease-of-change during the process, and involvement of the user. For large projects some companies use Spiral model. Here the system requirements are defined in as much detail as possible to identify and resolve risks in the software development process. Our project is as yet not that large. Therefore we analyze risks only rudimentarily.
Rapid application development comprises many modern software development methodologies, like Agile software development, Lean software development and Scrum. The project is broken into smaller segments to reduce risk and provide more ease-of-change. Users are being actively involved in the process, and the software is build iteratively.
Iterative and Incremental Development Methodologies
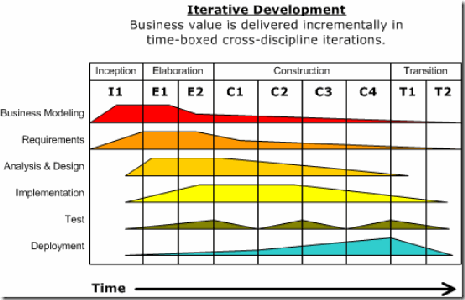
Since requirements may change or the product owner may not now all requirements at the start iterative and incremental development methodologies are being used. The basic idea is to develop a system through repeated cycles of planning, design, implementation, testing and evaluation – and develop small portions of the software at a time.
One example is the Unified Process framework, which is iterative and incremental, use case driven, architecture centric and risk focused. Similar frameworks are the IBM Rational Unified Process and the Agile Unified Process.
Agile Development
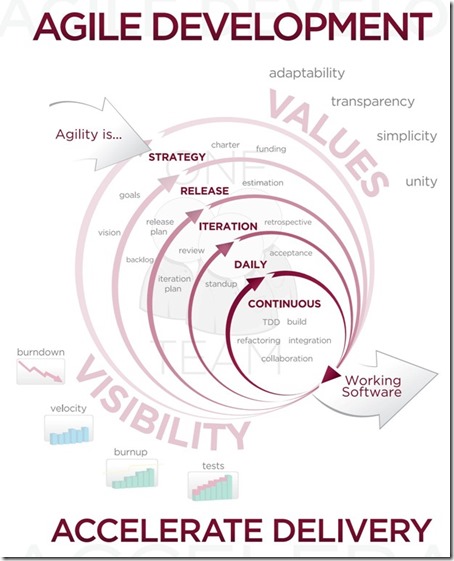
Essentially we will use Agile software development. It allows for changing requirements, regular adaptation of the process, delivering working software frequently, getting feedback, and higher customer satisfaction. It promotes simplicity and trusting in motivated individuals involved in the process.
There is still much to learn about agile development. It is the superordinate concept for different software development methods like Scrum, Feature Driven Development, Extreme Programming. I will read about these in the near future. As a team we will need to adopt the mindset of agile development more thoroughly. The biggest mistake for teams using agile development seems to be to put implementation of the process over changing the way of thinking.
